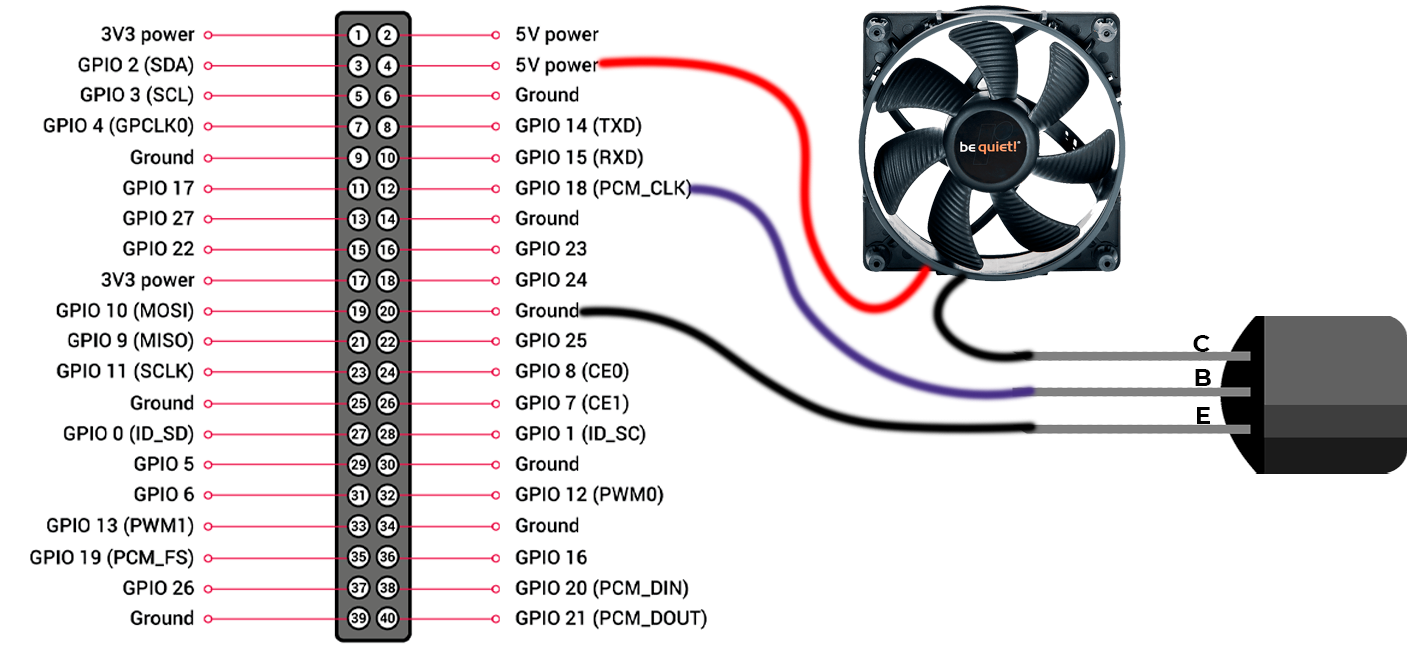
Simple Bash script to control the fan speed using the Rapsberry Pi GPIO and a transistor.
- Raspberry Pi
- PC Fan (if possible, that it doesn't exceed 0.20A)
- Soldering iron and some cables
- NPN transistor (I used the 2N3904, but you can use any general purpose amplifier)
The circuit is pretty simple. First you have to be careful identifying the three legs of the transistor, the middle one is the longest (Base) and from it, we can identify the other two (Emitter and Collector).
Once we have located them we can start soldering:
- Connect the positive pole of the fan to PIN4 of the GPIO
- Solder the Collector with the negative pole of the fan
- Connect the Base with the GPIO18(PIN12), it's important to use this pin because it's the only one compatible with PWM
- Finally, we join the Emitter with any Ground Pin of the GPIO (In my case PIN20)
First of all we'll need to access our system via SSH or open a terminal to install the GPIO access library for the Raspberry Pi:
sudo apt install wiringpi
Then we create a text document on the home directory and copy the content of fan.sh:
cd ~
nano fan.sh
Paste the script and save it with CTRL+X. When we exit the editor, we'll give the script execution permissions with:
sudo chmod +x fan.sh
Now the script is ready to be used. But we'll need run it manually every time the computer is started. To solve this we'll use a Linux daemon called Cron:
crontab -e
Paste the next line at the end of the file where there is no #:
@reboot /bin/bash /home/pi/fan.sh > /dev/null 2>&1
Save it with CTRL+X and exit.
Now the script is scheduled. To execute it we need to restart and it'll start running in the background.
sudo reboot
